How to create a shared mailbox in Microsoft 365 Exchange Online
This article will show you how to set up Shared Mailboxes for Exchange Online.
Please see this article for basic Exchange Online settings.
How to set up custom domain in Microsoft365 and use Microsoft's email service
What is a shared mailbox?
An email address that can be managed by multiple users.
With shared mailboxes, you don't have to make a new user to manage emails such as info@domain.com or contact@domain.com.
By assigning an existing user to a shared mailbox, the address can be managed by multiple people.
Create a shared mailbox
Go to the Exchange admin center, click on the Mailboxes tab, and click on Add a shared mailbox.

Add a shared mailbox
Enter your Display Name, Email address, and Alias and click Create.
Alias is not a required field, but if you do not enter it, you will get an error message.
The help page says that alias is also a required field.
It would be fine if it is the same as the display name.
Add a user
After adding a shared mailbox, add members.
The first time, the flow for adding members is built into the wizard for creating a shared mailbox, so follow the wizard to add members.
If you want to add or remove members later, click on the name of the shared mailbox you created and select Delegation from the menu that appears.
You will see two options here, Full Access and Send as, but you will need both permissions to use the shared mailbox.
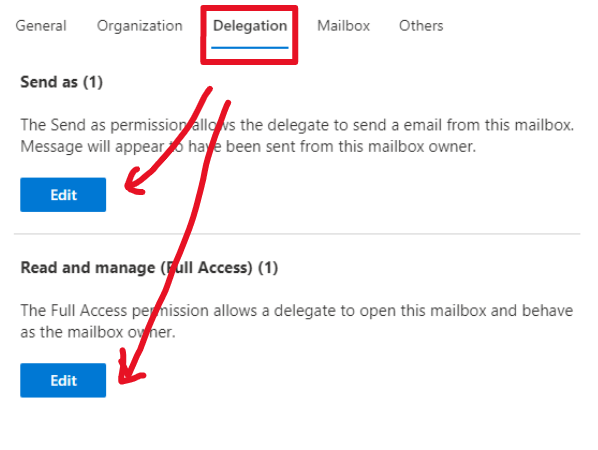
Assign both permissions of Full Access and Send As
Add a shared folder to Outlook on the web
Right click on a folder on the left side of Outlook on the web and click on Add Shared Folder.
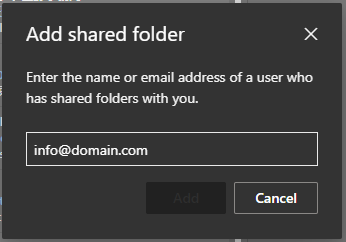
A pop-up will appear. Enter the address of the shared mailbox and click Add.
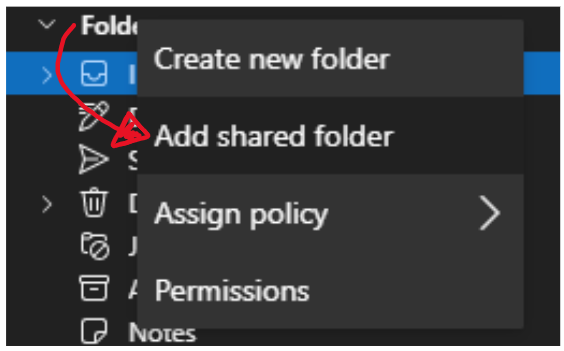
Click Add Shared Folder
共有メールボックスのアドレスを入力して追加をクリック
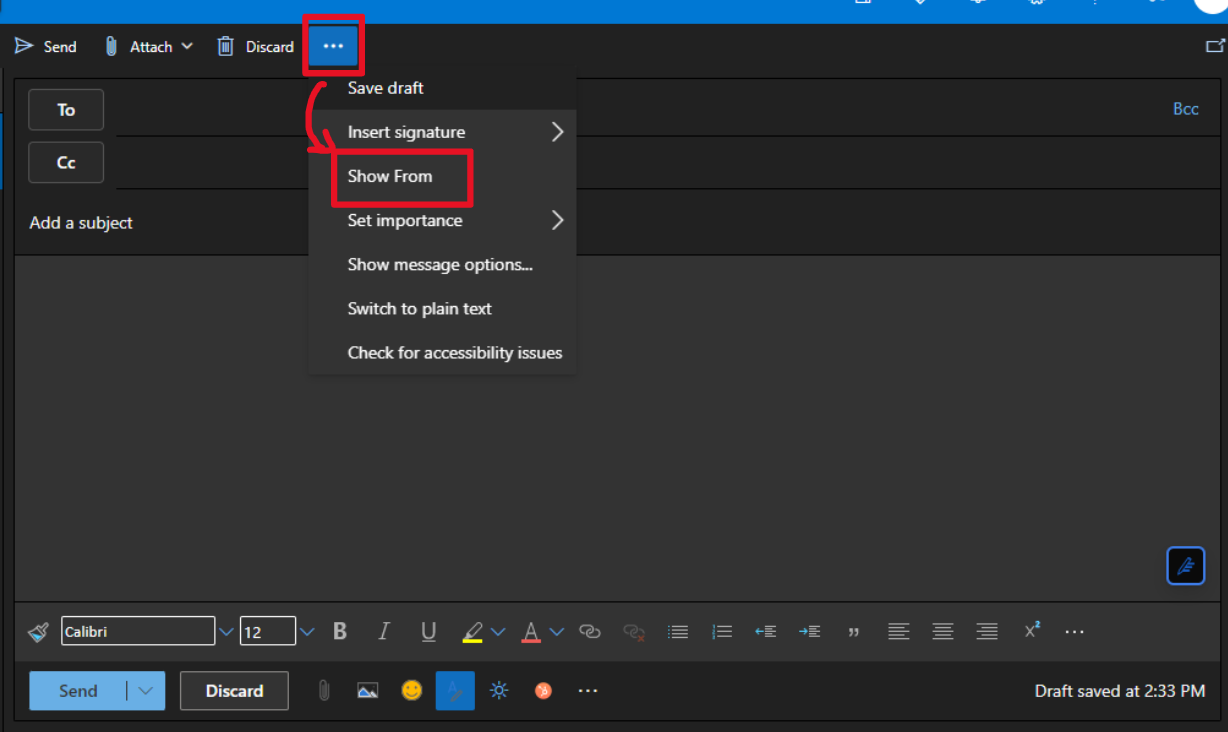
Send from a shared mailbox address
This is a bit cumbersome.This is a bit tricky.
First, click the ... icon at the top of the compose screen, and click Show From.
Then the From will be displayed.
By default, your e-mail address is displayed in the From field.
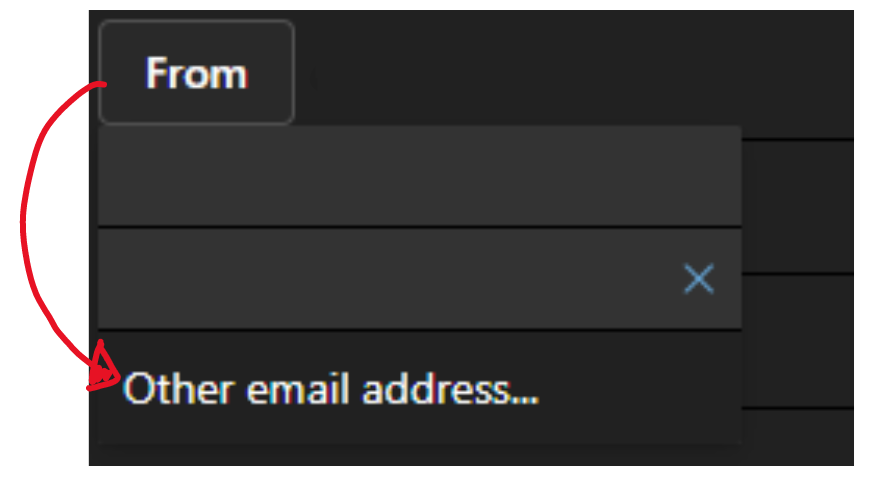
To change it, click From, then click Other email address.
Then manually enter the address of your shared mailbox and send a test email.
Then the next time you select `From', you will be able to select the email address you just entered.
Show From
Edit From